With my very first digital SLR there was a sigh of relief, everything was going to be so much easier now and I didn’t have to think anymore.
You know the scenario; you pull the camera out, charge the batteries, go for a walk around the house and down the street taking the same pictures you have taken every time a new camera came into your life. “This is great!” you think to yourself, “this is going to make my life so much easier!” I was wrong… In fact, I was dead wrong.
There are three very simple things that improve all photography, including portraits. To this day, there is no trick I have found that replaces the need forproper exposure,white balance, andsharp focus. Today’s digital cameras have less exposure latitude than a roll of Kodak gold film. In-camera metering systems have become much more advanced, but the sensors still lack the seven ƒ-stop exposure latitude that negative film has.
1) Never select all of the focus points for portraits, pick one.
When you pick the autofocus option that allows the camera to select focus points, you are doing your portraits a terrible disservice. This feature of a camera is usually designed to pick whatever is closest to the lens and focus there. In some cases, like with my 1DS Mark III, the camera will choose a cluster of focus points and make a “best guess” based on averaging the distance between all of the chosen points. Using one focus point gives you, the photographer, ultimate control.
2) Always focus on the eyes.
The eyes are the windows to the soul, and should be the focal point of any good portrait. Not only are the eyes the most important part of a good portrait, but they are the sharpest element on the face and should be left that way. When you are shooting with a wide aperture value focused on the eyes, the lens’s bokeh will aid in softening the skin as well.

Image by Geomangio
3) Shoot wide open for shallow depth of field.
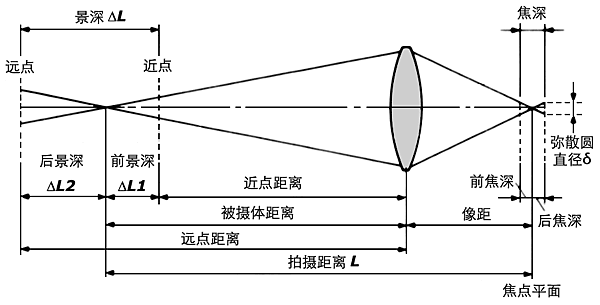
There are quite a few reasons to invest in a fast lens capable of wide aperture values; the most common is for shallow depth of field. Now that you can shoot at ƒ2.8 or ƒ4 you should use it. Most fantastic natural light portraits are from wide aperture values and it is all because of the wonderful smooth background blur we call “bokeh”.
4) Never, ever, shoot a portrait at less than 50mm; try to stay at 70mm or higher.
The last thing you want to hear from a client is “Why does my head look swelled?” Any focal length below 70mm can distort your subject, however it doesn’t become very noticeable until you are below 50 MM. The compression effect of a telephoto lens will also increase the blur of bokeh. Most of my portraits are done between 120mm and 200mm.
5) Always shoot in RAW.
A thousand times these words have bellowed from my mouth, and it will surely come out a million more. Raw is an unmodified compilation of your sensors data during the time of exposure. It is your digital negative. When you shoot in JPG format, everything but what the image processor needs to make a shell representation of the image you intended to capture is stripped away. For every edit you make to a JPG, you lose more data. With RAW, you can make a vast range of edits before creating the JPG. How can this make you portrait better? Think about the last time your white balance was set incorrectly, and you tried for hours to remove the color cast only to destroy the image with every attempt. RAW would have saved you by allowing you to fix the color before opening the image for retouching.
6) Always bring a gray card or a piece of a gray card for white balance.
You got me, gray cards aren’t free. However, $5.95 US for a cardboard Kodak gray card is darn close. To avoid confusion, I am going to explain this backwards. When opening Adobe Camera Raw or any other RAW image editing application there is always a way to select a custom white balance. Usually it is an eyedropper of some kind that you can use to click on what you think is neutral gray in your image. Imagine a world where your photo shoot involved 4 locations and a total of 800 images, and all day the camera was set to Auto White Balance. That is 800 different white balance values, a post production nightmare. If, at each location, you have your subject hold the gray card on the first shot, you will save hours of work. When you open location one (200 images) in your favorite post production application, all you have to do is click the eye dropper on the gray card, select all and synchronize the rest. Precious hours have been saved. (If you plan on taking your time, it may be wise to do this once every 30 minutes or so to compensate for the changing light of day.)
7) Shoot in the shade (Avoid direct sunlight)
Direct sunlight is harsh, makes your subject squint, and creates hard directional shadows and unpredictable white balance conditions. When shooting in the shade, there are no more harsh shadows, only smooth milky shadows created by your subject’s natural features. With proper exposure and white balance, you can make these shots look amazing.
8) Shooting carefully on an overcast day.
Natures softbox is a giant blanket of clouds. A good heavy blanket of cloud cover can help you enrich your colors, and make some very smooth and pleasing shadows.
9) If you must use hot, hard, bright light…
Always try to control the direction, use some kind of reflector, and try to mimic a studio light. Putting the sun directly behind your subject isn’t a good idea, unless you are trying to make a silhouette. When the sun is at my back, I have the subject look off camera (away from the sun) and get very nice results. Another great trick is to wait for a cloud to move in front of the sun, this usually creates a very bright yet contrasted look.

Image by Meredith Farmer
10) Use an existing reflector.
For example, my guess is that about 75% of the delivery trucks on the planet are white. These big white delivery trucks can make amazing fill light reflectors as long as they weren’t painted with an off white. (A yellow tint can change the white balance in your shadows.) Picture framing outlets and craft stores always have medium to large sized pieces of foam core lying around that have been left for scrap. They are usually more than happy to part with these scraps, and if not, chances are there are pieces by the dumpster.
11) Learn the sunny ƒ16 rule.
Why? So you have a baseline for proper exposure in your mind to work with if no other tools are present. The sunny ƒ16 rule states that on a sunny day, with your aperture value set to ƒ16, your shutter speed will be the inverse of the current ISO speed. For example, if your camera is set to ISO 100, and your aperture value is ƒ16, your shutter speed will be 1/100th of a second. On a cloudy day (or when in the shade) you simply use ƒ8 instead. If you own either an incident light meter, or gray card use either for the most accurate exposure instead. (Note: the procedure for metering exposure with a gray card is not the same as a custom white balance.)
12) Bring a sheet and a few spring clamps from home.
Leave the expensive 200 thread count sheets on the bed. You already got them? Well go put them back. You know that cheap old sheet you stuck in the corner of a closet to use as a drop cloth the next time you paint? Go get it. (Another option is to buy the cheapest, lowest thread count, white top sheet you can find.) A queen size sheet is an amazing, cheap, diffuser. Sort of a sever foot soft box for the sun. Wrap an edge of the sheet around a branch or clothes line and clamp for a side light. (Anchor the bottom corners with rocks to keep it from blowing into your image.) Clamp all for corners to anything you can above your subject for an overhead light.
13) Keep the power-lines and signs out!
We have already discussed keeping your camera focused on the eyes; keep your mind focused on the image as a whole. Power lines, signs, long single blades of grass, single pieces of garbage, sometimes even trees can be serious distractions from the overall focus of the image… The person you are photographing.
Last, and most important, have a great time shooting, enjoy what you’re doing and it will show in your work, and the expression of your subject.
A few Bonus Tips on Shooting on Cloudy Days
Clouds are wonderful. They create a giant blanket of natural sunlight diffusion to make your images rich and powerful. The clouds can fool your mind in ways you can’t imagine, much like your mind corrects for the natural white balance throughout the day.
When you are shooting on an overcast day, custom white balance is especially important. Every day is completely different for color, and that color depends on two things. First, the time of day, as most people understand white balance and how it changes throughout the day. Second, you have to account for all of the wonderful things that light has to pass through before it hits your subject.
Pollution changes the color of the light from minute to minute even if your eyes don’t see it, your camera does. On a cloudy day, pollution particles are being carried around in the sky by little tiny prisms; water droplets. Now your sunlight is passing through nature’s prism and reflecting off of pollution particles in infinite directions.
Don’t forget to white balance with that custom, tricked out, six dollar piece of cardboard, your Kodak gray card.
The ultimate secret to shooting on a cloudy day is a compass. (You either tipped your head like a confused Chihuahua or just had an epiphany.) I am an experienced, internationally published photographer, and rarely can I see where the sun is coming from on an overcast day. The light isn’t omnipresent; it’s just diffused, softened and scattered. Sunlight on a cloudy day is still directional, and your subject still has a dark side. Use a compass to find out where the sun is, put it at your back and shoot like mad. Never again will you look at an image after and wonder why the sky is blown out when it was so cloudy, or why the clouds look great but your subject is dark.
Read more: 13 Tips for Improving Outdoor Portraits -http://digital-photography-school.com/13-tips-for-improving-outdoor-portraits#ixzz0CbQIYzQ4


 screen.width-350)this.width=screen.width-350" _base_target="_self" border="0">


